Moroccan Beef Stew
I've stolen this recipe fair and square and tweaked it; now I'm ready to share. Cooking it will fill the house with lovely aromas and then deliver a savory meal. The instant I read the recipe, I knew it would be worth fixing. My first time through, I made the recipe without the beef, but loved it so much that I ran to the store for some top round and 'retrofitted' the dish. Here, then, is my version...
Heat 2 Tbsp olive oil and brown 1 lb. beef chunks (round or chuck,) remembering not to crowd the pan; remove to a plate.
While the beef is searing, peel a large onion and halve it; turn each half on its flat side and cut side-to-side. Then slice from top to bottom into narrow slivers. This is more attractive than plain old chopping. Once the beef is out of the pan, add the onion slivers and cook over low heat until soft, stirring to release the browned juices on the bottom of the pan. When the onion is translucent, return the beef to the pan and add the following:
2-3 Tbsp minced fresh ginger
4-5 cloves minced garlic
2-3 tsps ground cumin
2 tsps ground cinnamon
1/2 tsp crushed red pepper
scant tsp Kosher salt
1 14.5-oz can diced tomatoes (no sodium preferred)
1 8-oz can tomato sauce (again, no salt added)
1.5 cups low-sodium beef broth (rinse the cans with broth; waste not, want not)
AND finally, add a peeled, cubed butternut squash--1 to 1 1/2 lbs. I make an effort to cut the chunks into fairly equal sizes, but some variation is inevitable. It's hard to peel, so I cut the squash up first, then work slowly with a small knife to peel and then cube. Surprisingly, the squash does not seem to soften and disintegrate as it cooks. Add a little more beef broth if the meat and squash chunks are not covered.
Bring to a boil and then simmer, covered, 45 minutes. This can be simmered 30 minutes, then allowed to sit off the heat for a couple of hours before final reheating and cooking. It improves with time to mellow.
I serve this over brown rice. The original recipe recommended toasted slivered almonds as a garnish--and they're very nice if you happen to have some on hand. A green salad is an excellent accompaniment, of course, but this can be a meal by itself. The beef can be omitted for a vegetable dish; or leftover chicken could be heated with the rice, then topped with the sauce. It's that versatile and tasty.
This is one Mean Old Lady!

Self-portrait: 'Quilter on Fire'
Showing posts with label recipes. Show all posts
Showing posts with label recipes. Show all posts
Saturday, March 5, 2011

Tuesday, January 4, 2011
Cabbage-heads!
We spent New Year's Eve and New Year's Day in Vicksburg; the DHubby and Daughter had a number of bowl game assignments lined up. DH wore his Penn State sweatshirt for luck. I went along for the ride, basically--and also to serve as chief cook and bottle-washer. After some phone consultation on our menu choices, our daughter (pretty much a non-cook) shopped for groceries and stocked the larder, planning to have Cornish game hens one night and pork chops the next. Cole slaw was to be one of the side dishes, along with sweet potatoes, green beans, and hoppin' john.
Aside: the night of the 30th / 31st was stormy, and we set off in rainy, windy, muggy conditions. I'm blaming the weather for our forgetting the shopping bag with extra ingredients and the wine--obviously, a nearly tragic oversight! We stopped at a small local grocery, Super Junior, before arriving at our daughter's home, since I knew what had been left behind; after we unloaded the car, DH set out for a nearby wine shop for additional necessities.
Once supplied and snugly inside--just before a huge storm broke--we began putting things away. I opened the refrigerator and saw a large, green, round, shrink-wrapped item........and I asked our daughter, "Dear, did you think you were buying cabbage? Because this is iceberg lettuce." (Hilarity ensues.) Actually, it came in handy for lunch sandwiches the next day.
On New Year's Day, the Football Buddies cheered in vain for their teams, all of whom (alas) lost their bowl games. I busied myself in the kitchen, took a walk, worked some crosswords....then ran out for a couple of items from Super Junior (thankfully, it was open!) after our discovery that Kroger's chops were, um, expired. I was rummaging happily for the nicest pork chops when a young guy (nineteen or so) said, "Ma'am? Could you help me?" He gestured at the vegetable display. "Which one of these is cabbage?"
He was reaching for the iceberg lettuce. Survival tip: when in doubt, ask a gray-haired old lady. I picked out a nice cabbage for him, saying, "My daughter just made the same mistake!"
If you are able to tell the difference between iceberg lettuce and cabbage, please try this nice dressing on your slaw:
2 packets Truvia (zero calories) or 2 Tbsp sugar
3 Tbsp rice wine vinegar
1 tsp salt
1/4 tsp freshly ground pepper
Whisk in a bowl or shake in a small jar to dissolve salt and sweetener.
Add: 2 Tbsp vegetable oil
1 Tbsp sesame oil
Whisk or shake well to combine and toss with shredded cabbage. (You might also add some shredded red bell pepper, and the addition of toasted sunflower seeds is tasty.)
Aside: the night of the 30th / 31st was stormy, and we set off in rainy, windy, muggy conditions. I'm blaming the weather for our forgetting the shopping bag with extra ingredients and the wine--obviously, a nearly tragic oversight! We stopped at a small local grocery, Super Junior, before arriving at our daughter's home, since I knew what had been left behind; after we unloaded the car, DH set out for a nearby wine shop for additional necessities.
Once supplied and snugly inside--just before a huge storm broke--we began putting things away. I opened the refrigerator and saw a large, green, round, shrink-wrapped item........and I asked our daughter, "Dear, did you think you were buying cabbage? Because this is iceberg lettuce." (Hilarity ensues.) Actually, it came in handy for lunch sandwiches the next day.
On New Year's Day, the Football Buddies cheered in vain for their teams, all of whom (alas) lost their bowl games. I busied myself in the kitchen, took a walk, worked some crosswords....then ran out for a couple of items from Super Junior (thankfully, it was open!) after our discovery that Kroger's chops were, um, expired. I was rummaging happily for the nicest pork chops when a young guy (nineteen or so) said, "Ma'am? Could you help me?" He gestured at the vegetable display. "Which one of these is cabbage?"
He was reaching for the iceberg lettuce. Survival tip: when in doubt, ask a gray-haired old lady. I picked out a nice cabbage for him, saying, "My daughter just made the same mistake!"
If you are able to tell the difference between iceberg lettuce and cabbage, please try this nice dressing on your slaw:
2 packets Truvia (zero calories) or 2 Tbsp sugar
3 Tbsp rice wine vinegar
1 tsp salt
1/4 tsp freshly ground pepper
Whisk in a bowl or shake in a small jar to dissolve salt and sweetener.
Add: 2 Tbsp vegetable oil
1 Tbsp sesame oil
Whisk or shake well to combine and toss with shredded cabbage. (You might also add some shredded red bell pepper, and the addition of toasted sunflower seeds is tasty.)
Sunday, December 19, 2010
Food, glorious food!
Christmas at our house is usually the occasion for a sumptuous breakfast--thick bacon, rich scrambled eggs, grits with butter, jam and biscuits, fresh orange juice. When we had small children in the house, an early pre-breakfast of quick bread (while the adults guzzled coffee) was a stop-gap that gave us the energy for opening Santy's gifts. Then came the big breakfast, meant to hold us all until the serious feasting of the afternoon. Christmas, in other words, was cooking.
It still is....just on a smaller scale. It's not so much the permanent diet I'm on, it's the flagging energy. Wasn't Thanksgiving just yesterday? This year's 'feast' will be a modest dinner with grilled steak....and yeast biscuits. There are just some things we can't do without!
The original recipe for these biscuits came from a cookbook of 'Southern baking' written by one Prudence Hilburn. (My maiden name--Hilburn--made me pick up the book.) Prudence was a fan of self-rising flour, something I've come to regard as another of the tin fiddles marring modern life. Fresh baking powder (yes, it does go bad) is a must if you want good biscuits. And these are not just baking-powder biscuits--they're Yeast Biscuits.
The master recipe makes a large batch of dough that will keep in the refrigerator for a week; however, it is dangerous to have that many yeast biscuits around the house, because we'll eat them and gain back all the weight we've managed to walk off. Therefore, this recipe is for one batch; (double it if you want the larger supply.) You can make the dough the night before to save some time. I like to prepare the biscuits and then let them warm and rise for a while before baking.
Combine and allow to foam:
a scant 1/4 cup warm water;
1 Tbsp sugar
1 Tbsp active dry yeast (or one packet)
Mix:
2 1/2 cups flour
1 generous Tbsp baking powder
1 tsp salt plus another pinch
1/2 tsp baking soda
Cut in:
1/2 cup shortening (I use Crisco bars, not butter, and certainly not lard)
Then add the yeast mixture and 1 cup buttermilk (the Bulgarian buttermilk is superior)
Mix well to get a 'rough' dough--it will not be smooth and elastic like bread dough. Cover and refrigerate (or proceed as below.)
To prepare biscuits, turn out dough onto floured board or clean counter-top. Grease a baking pan or sheet. Lightly knead a few times, pat out to 1/2" thickness, and cut into rounds. Allow to rise for a bit. Bake in a 375 degree oven for 10 to 15 minutes. (Check one; you don't want a wet, doughy inside.) Don't expect left-overs.
It still is....just on a smaller scale. It's not so much the permanent diet I'm on, it's the flagging energy. Wasn't Thanksgiving just yesterday? This year's 'feast' will be a modest dinner with grilled steak....and yeast biscuits. There are just some things we can't do without!
The original recipe for these biscuits came from a cookbook of 'Southern baking' written by one Prudence Hilburn. (My maiden name--Hilburn--made me pick up the book.) Prudence was a fan of self-rising flour, something I've come to regard as another of the tin fiddles marring modern life. Fresh baking powder (yes, it does go bad) is a must if you want good biscuits. And these are not just baking-powder biscuits--they're Yeast Biscuits.
The master recipe makes a large batch of dough that will keep in the refrigerator for a week; however, it is dangerous to have that many yeast biscuits around the house, because we'll eat them and gain back all the weight we've managed to walk off. Therefore, this recipe is for one batch; (double it if you want the larger supply.) You can make the dough the night before to save some time. I like to prepare the biscuits and then let them warm and rise for a while before baking.
Combine and allow to foam:
a scant 1/4 cup warm water;
1 Tbsp sugar
1 Tbsp active dry yeast (or one packet)
Mix:
2 1/2 cups flour
1 generous Tbsp baking powder
1 tsp salt plus another pinch
1/2 tsp baking soda
Cut in:
1/2 cup shortening (I use Crisco bars, not butter, and certainly not lard)
Then add the yeast mixture and 1 cup buttermilk (the Bulgarian buttermilk is superior)
Mix well to get a 'rough' dough--it will not be smooth and elastic like bread dough. Cover and refrigerate (or proceed as below.)
To prepare biscuits, turn out dough onto floured board or clean counter-top. Grease a baking pan or sheet. Lightly knead a few times, pat out to 1/2" thickness, and cut into rounds. Allow to rise for a bit. Bake in a 375 degree oven for 10 to 15 minutes. (Check one; you don't want a wet, doughy inside.) Don't expect left-overs.
Friday, November 19, 2010
Cranberries
The virtues of cranberries are being touted everywhere these days. Seriously--they're not only good for us, they're pretty and festive, not to mention delicious. Still, every year when I have to pass by a wall of canned jelled cranberries, I cringe and avert my eyes. That canned stuff is evil.
A half-hour of work and two bags of fresh cranberries can furnish you an entire holiday season of cranberry sauce, plus a jar to give away. If you make this the first week the berries appear in the stores, you get a jump on the season's cooking-- and you'll never have to turn back to the dark side again!
Allow me to share:
Cranberry sauce
Start with 2 bags of fresh cranberries, picked over, in a saucepan.

(Set aside a scant 2 cups; this should leave you with a pound, give or take.)
Grate about a tsp of orange zest, then juice 3-4 oranges for 1 cup of fresh OJ.
Add that to the pan along with 1 cup of sugar.
Bring rapidly to a boil, stirring often; lower the heat to medium and cook for 15 minutes. Continue to stir frequently as this boils.
Some of the berries will be left unpopped, but don't worry about them. The natural pectin will cause this sauce to jell without any further effort on your part.
Remove from the heat and add the orange zest, then ladle into jars--pretty jelly jars for gift-giving, but at least 1 pint jar --or a bowl-- for your Thanksgiving table. Refrigerate any sauce that is not in a sealed jar. It keeps beautifully, and it's also tasty as a jelly on rolls or toast.

What about the other 2 cups? Sometimes I've had to discard a lot of berries and don't have this many extra, in which case I just add more berries to the saucepan. But if I have a gracious plenty, I make this:
Cranberry-Orange Relish
Cut a thin-skinned orange into chunks, removing seeds and some of the membrane--but don't get too picky. Measure out 1/2 cup sugar and place in blender or food processor with the orange. Chop; then scrape down bowl and add cranberries and chop briefly.
Do this in two small batches if using a blender, or in one batch if using a food processor. Do not over-process. Voila. This keeps well (refrigerated, of course) and improves if allowed to mellow for a few days before serving.
A half-hour of work and two bags of fresh cranberries can furnish you an entire holiday season of cranberry sauce, plus a jar to give away. If you make this the first week the berries appear in the stores, you get a jump on the season's cooking-- and you'll never have to turn back to the dark side again!
Allow me to share:
Cranberry sauce
Start with 2 bags of fresh cranberries, picked over, in a saucepan.

(Set aside a scant 2 cups; this should leave you with a pound, give or take.)
Grate about a tsp of orange zest, then juice 3-4 oranges for 1 cup of fresh OJ.
Add that to the pan along with 1 cup of sugar.
Bring rapidly to a boil, stirring often; lower the heat to medium and cook for 15 minutes. Continue to stir frequently as this boils.
Some of the berries will be left unpopped, but don't worry about them. The natural pectin will cause this sauce to jell without any further effort on your part.
Remove from the heat and add the orange zest, then ladle into jars--pretty jelly jars for gift-giving, but at least 1 pint jar --or a bowl-- for your Thanksgiving table. Refrigerate any sauce that is not in a sealed jar. It keeps beautifully, and it's also tasty as a jelly on rolls or toast.

What about the other 2 cups? Sometimes I've had to discard a lot of berries and don't have this many extra, in which case I just add more berries to the saucepan. But if I have a gracious plenty, I make this:
Cranberry-Orange Relish
Cut a thin-skinned orange into chunks, removing seeds and some of the membrane--but don't get too picky. Measure out 1/2 cup sugar and place in blender or food processor with the orange. Chop; then scrape down bowl and add cranberries and chop briefly.
Do this in two small batches if using a blender, or in one batch if using a food processor. Do not over-process. Voila. This keeps well (refrigerated, of course) and improves if allowed to mellow for a few days before serving.
Sunday, August 15, 2010
New Kid on the Block

I love to cook, I love to eat, and one can give up only so much. I've cut waaaay back on butter, I've given up coffee (because of the cream), and we have desserts only occasionally. The latter is less of a hardship, since I do not have a serious sweet-tooth, although I admit that salt is a weakness. Still, sometimes recipes call for sugar.... so I'm experimenting with substitutes. Natural substitutes, that is; we quickly realized we could not abide Splenda. The newest product is agave nectar; I bought this at WalMart.
It is advertised as having a low glycemic index (i.e., it does not seriously increase blood sugar.) It is a little less viscous and sticky than honey; in terms of sweetness, the website suggests 2/3 cup of nectar substitutes for 1 cup of sugar (with adjustment to the amount of liquid in the recipe.)
Our neighbor at the lake gave us 2 dozen fresh eggs, right after we'd bought eggs at both the grocery store and the farm market. Oops. Baked custard uses 4 eggs, so.....
Beat 3 whole eggs plus one additional yolk in a mixing bowl; add a tiny pinch of salt, a scant 1/4 cup agave nectar, and 1 tsp. vanilla. When combined, add 2 cups less 2 Tbsp. milk. Pour into a ceramic or glass baking dish, dust with nutmeg if you like, and place on a rack in a pan of hot water (called a Bain Marie.) Bake in a 325 degree oven for 30 minutes. Test by inserting a knife about one inch from side of dish; the knife should come away clean. The center of the custard will still have some 'shimmy' when it's time to remove the dish to a rack. Usually served chilled, with fresh fruit on top, but delicious while still warm, too. It ...um...makes a delicious breakfast.
I made one for us and one for the neighbor and his wife.
Thursday, June 10, 2010
The Joy of Visits
How to celebrate the too-seldom gathering of one's offspring? (More importantly, how to occupy one's mind and hands when the young folk are on the road?) How to tempt a repeat visit before too much more time passes?
Two words: Yeast Biscuits.
Sinfully good for breakfast. lunch, or supper. Easy to make if you know a few tricks. A great way to fill the kitchen with welcoming fragrance. A sure-fire way to gain back those three pounds you worked so hard to lose.
Combine and allow to foam: 1/4 cup warm water; 2 Tbsp sugar; 2 Tbsp active dry yeast (or two packages, which amount to slightly less)
Mix: 5 cups self-rising flour, 1 tsp. baking soda
(Self-rising flour is plain old flour that has baking powder and salt already added. You can look up the proportions and do it yourself, but the individual I got this recipe from was slightly lazy.)
Cut in 1 cup shortening-- (I use1 bar of Crisco, though butter would be, well, fabulous.)
Add the yeast mixture and 2 cups of buttermilk. (My preference is Bulgarian buttermilk; if you are desperate, add 1 tsp lemon juice for each cup milk and allow to stand 10 minutes. But keep in mind, buttermilk lasts forever and makes fab pancakes, so go ahead and buy the real thing. And, yes, some people are willing to consume buttermilk as a beverage, but I am not one of them...shudder.)
Mix well to get a rough dough--it will not be smooth and elastic like bread dough. Cover tightly and refrigerate. Keeps one week. (If you get some discoloration, ignore it.)
You can bake anything from two rolls to the whole shooting match.
To prepare biscuits:
Pull out desired amount of dough and put on floured board. (Well, to be honest, I just use the clean counter top.) Grease a baking pan or sheet; yes, even if it's nonstick. Lightly knead your dough 2-3 times, pat or roll out to 1/2" thickness, and cut into rounds. If you are so benighted as to lack a cutter, use a thin-lipped glass or just criss-cross with a knife into even squares. Space about 1" apart. Allow these to rise for a while; I cover with a damp dish towel, and I wait up to an hour to bake. Preheat oven to 375-400; ovens vary, so be flexible. You don't want the bottom too browned and hard before the top is nicely tan. They will bake in 10 to 15 minutes; check one--you do not want a wet, doughy center. Serve with butter; nothing else is really fair. These go with everything-- jam, eggs and bacon, blue-gill fillets-- honest, it's hard to go wrong.
This is my version of a recipe from a Prudence Hilburn cookbook, Treasury of Southern Baking. My maiden name was Hilburn, and I just had to check the book out of the library..... I think she does a few things wrong, but she might have jumped the rails one way or another. I myself married a Yankee, so I point no fingers.
Two words: Yeast Biscuits.
Sinfully good for breakfast. lunch, or supper. Easy to make if you know a few tricks. A great way to fill the kitchen with welcoming fragrance. A sure-fire way to gain back those three pounds you worked so hard to lose.
Combine and allow to foam: 1/4 cup warm water; 2 Tbsp sugar; 2 Tbsp active dry yeast (or two packages, which amount to slightly less)
Mix: 5 cups self-rising flour, 1 tsp. baking soda
(Self-rising flour is plain old flour that has baking powder and salt already added. You can look up the proportions and do it yourself, but the individual I got this recipe from was slightly lazy.)
Cut in 1 cup shortening-- (I use1 bar of Crisco, though butter would be, well, fabulous.)
Add the yeast mixture and 2 cups of buttermilk. (My preference is Bulgarian buttermilk; if you are desperate, add 1 tsp lemon juice for each cup milk and allow to stand 10 minutes. But keep in mind, buttermilk lasts forever and makes fab pancakes, so go ahead and buy the real thing. And, yes, some people are willing to consume buttermilk as a beverage, but I am not one of them...shudder.)
Mix well to get a rough dough--it will not be smooth and elastic like bread dough. Cover tightly and refrigerate. Keeps one week. (If you get some discoloration, ignore it.)
You can bake anything from two rolls to the whole shooting match.
To prepare biscuits:
Pull out desired amount of dough and put on floured board. (Well, to be honest, I just use the clean counter top.) Grease a baking pan or sheet; yes, even if it's nonstick. Lightly knead your dough 2-3 times, pat or roll out to 1/2" thickness, and cut into rounds. If you are so benighted as to lack a cutter, use a thin-lipped glass or just criss-cross with a knife into even squares. Space about 1" apart. Allow these to rise for a while; I cover with a damp dish towel, and I wait up to an hour to bake. Preheat oven to 375-400; ovens vary, so be flexible. You don't want the bottom too browned and hard before the top is nicely tan. They will bake in 10 to 15 minutes; check one--you do not want a wet, doughy center. Serve with butter; nothing else is really fair. These go with everything-- jam, eggs and bacon, blue-gill fillets-- honest, it's hard to go wrong.
This is my version of a recipe from a Prudence Hilburn cookbook, Treasury of Southern Baking. My maiden name was Hilburn, and I just had to check the book out of the library..... I think she does a few things wrong, but she might have jumped the rails one way or another. I myself married a Yankee, so I point no fingers.
Subscribe to:
Posts (Atom)
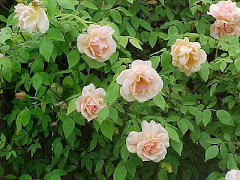
Rose 'Crepuscular'

Asparagus bed--post harvest
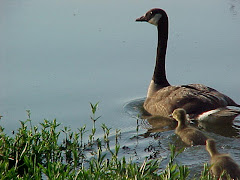
Lake Conway Mutti und Kinder